Categories
Business Tips

Tax tips for new print-on-demand drop-shipping entrepreneurs

Disclaimer: this article includes generalized tax return tips for entrepreneurs and does not replace professional advice. We strongly recommend contacting your accountant or legal counsel for professional advice or instructions regarding tax returns.

If you started an online business in 2020 (congratulations!), you may feel lost when it comes time to file your taxes. While it’s always best to contact a tax professional, we have some tips that can help prepare you for filing your taxes and alleviate some tax-related stress.

Know your deadlines

Tax deadlines vary between country and between the entity filing the tax return.

The deadline for Canadians to file and pay their taxes in 2021 is April 30, 2021. However, if you are self-employed and are expecting to receive a tax return, your deadline is June 15, 2021.

The deadline for U.S. citizens filing federal income tax was extended in 2021 but the extension does not apply to state and local tax returns.

Our advice? File early so you can avoid any surprises and always contact your tax professional to ensure you’re filing correctly.

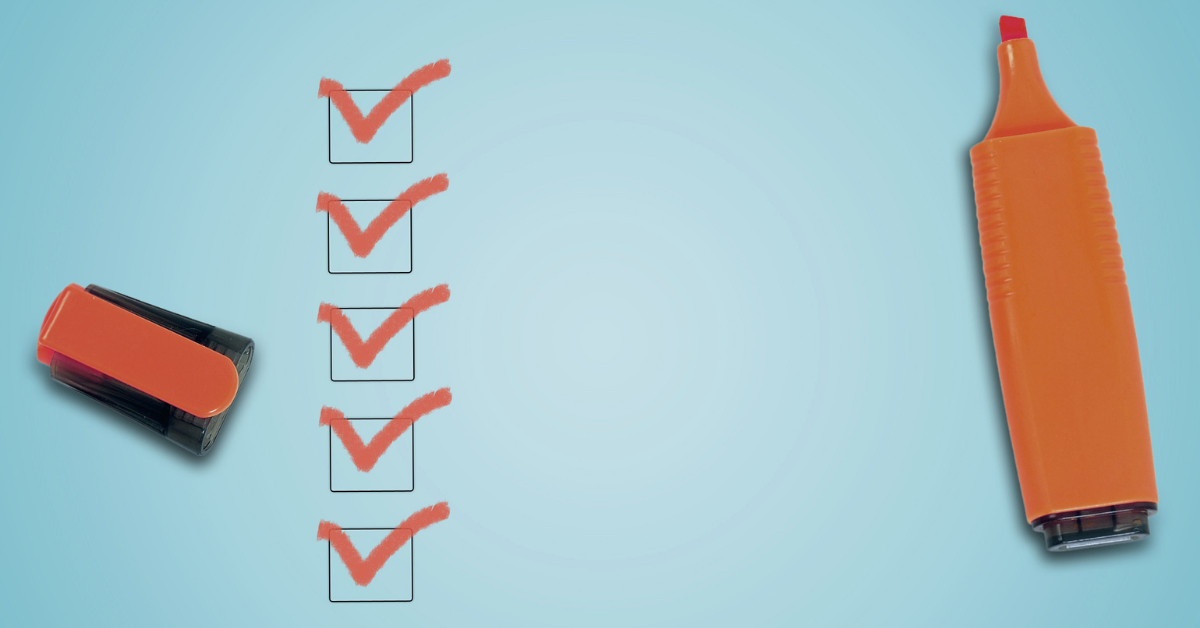
Claims, deductions and expenses

Setting up a print-on-demand drop-shipping business is typically low investment but there are some start-up costs to consider when filing your taxes. Make sure you keep all your receipts as a record to accurately file your taxes.

Take a look at the below list of expenses. These items may be eligible to claim on your tax return to lower your taxable income. Items, like computers or tablets, used for business and personal purposes could be eligible to claim at a percentage.

  • Contractor costs (freelance designers for any custom artwork)
  • Home office equipment (desks, chairs, computers, laptops, etc.)
  • Phone and internet bills
  • Web hosting and online store themes
  • Online services (Shopify!)
  • Advertising costs
  • Product sample orders for online store photography

Bookkeeping and record keeping

If you’re using an e-commerce platform, like Shopify, it’s simple to keep a record of your orders, sales and payouts.

To keep track of your online store’s revenue, Shopify populates an exportable “Finances” report under the “Analytics” tab in the left navigation side bar. You can also download your order history for the entire year under the “Orders” tab by applying the filter date from January 1 – December 31, 2021.

Your profit is the income you’ll need to claim on your taxes. To keep track of your profits, it will depend on how you set up your payments. For example, if you set up Shopify Payments, you can view all your payouts for the year in the “Payments” section of your Shopify settings. If you’ve chosen PayPal or a third-party provider to receive payments, you’ll need to pull the payment information for the year from your chosen provider.

If manual isn’t your style, there are plenty of bookkeeping software services available for subscription fees. You can create an automatic process between your online store and the bookkeeping software to keep track of your order details and payments.

Keeping a record of your finances, including previous years’ tax returns, will help verify the legitimacy of your income and can ensure your eligibility for tax credits as a small business. Also, these records showcase the financial position of your business and illustrate any business trends or performance as your business grows throughout the years.

If you are about to file your taxes, we recommended organizing your records and reaching out to a tax professional to ensure you’re filing correctly. No one likes a tax surprise.

Categories
Business Tips

Your print-on-demand drop-shipping checklist for Shopify

Do you need a checklist to make sure you’re on track to launch your new print-on-demand drop-shipping store or clothing line? We’ve got you.

1. Sign up with Slaite

Before you can get into the fun stuff like designing and promoting your new custom products, you need an account with Slaite. It takes less than 5 minutes and there is no financial commitment. Click here to start the process.

2. Select and design your custom products

Review our catalogue and select products for your store. Once you have a list of products to design, it’s time to bring your artwork to life.

We dive deeper into design steps and design hacks in this blog if you need more help. Or you can always send us an email – we would love to help you!

3. Order samples

Seeing is believing. Order a sample to test – and photograph – your product. While our free product mock-ups and other free mock-up tools such as PlaceIt do fine in a pinch, it’s beneficial for your online business to have final product images.

4. Download the Slaite app in Shopify

Click here to download the Slaite app for your Shopify store.

5. Publish your products to your Shopify store

In Slaite, navigate to “My Collection” and select “Publish” on any product you want to start selling. When the status is reads “Published”, you know you’re good to go.

6. Set up shipping profiles in Shopify

Setting up shipping profiles for your products is essential. This step will assign automatic shipping rates for your customers based on their geo-location.

We have an entire Slaite Library post and video showing you how to set these up, click here.

7. Edit and publish your product listings in Shopify

Once you’ve published your products to Shopify, you can edit your product listing before the product is active on your site. You can change your product title, description, image alt-text, mock-up image and price.

You can also add your products to collections to organize your clothing line by design, product type, season – whatever works for your brand!

Don’t forget to add tags, image alt-text and ensure your description is optimized for SEO. No one can buy your product if no one can find it. If you’re new to SEO – don’t panic. Shopify wrote a great help center article to give you an overview of how SEO works and how you can use it to gain sales, click here to read.

Once you’re happy with your product details and product locations on your site, you can set the product status to ‘active’ to begin receiving orders.

8. Plan to promote your products to build customers and sales

You don’t need a big advertising budget to start promoting your products. You can begin to organically promote your products with free social media tools, social media engagement and SEO.

It’s important to post consistently at a frequency that makes sense for your brand and engage with your audience. Another tip is to share your product reviews on social! You can screenshot and use free editing tools, like Canva, to post an aesthetic, on-brand version of the review in your feed.

9. Set up your social catalogue

If you’ve ever seen tiny shopping tag icons on a brand’s social page that bring the user from the app to a company website to purchase a product, that means a catalogue is in place for that company.

It may sound daunting but it’s a simple process. All you need is a Facebook Business Manager account (which takes minutes to set up) and create a catalogue in your business account that syncs to your Instagram or Facebook account. The set-up time depends on how many products you have but once it’s live, you can create a more direct path for your customers to purchase.

10. Incentivize content sharing

If your customers have an incentive to share and interact with your products and content, your engagement and exposure will increase.

Typically, companies will use giveaways to promote content sharing and engagement. If a giveaway doesn’t make sense for your brand, consider simple tactics like asking your audience questions in social posts or stories and ensuring you respond to queries quickly.

Don’t forget to add a branded hashtag to unify your posts and any customer-generated content. Encourage your customers to share posts of their new gear and use your branded hashtag. This community identifier will help you see all your customers engaging with your brand and it bridges the gap between your customers and the company they love.

If you’d like more support, have more questions or just want to share your final designs with us, we would love to hear from you. Send us an email or DM us on Instagram. We’re listening.

Categories
Business Tips

ART STUDENTS: How to sell custom clothing online this summer

Unpaid or low wage summer internships got you down? We’ve got a solution for you to help you earn extra income over the summer.

Like summer 2020, summer 2021 will be different. In previous years, students might land a summer internship (unpaid or low wages) to gain experience in their field but also get a side gig to earn extra cash.

Pandemic uncertainty has limited the supply for part-time student jobs this summer but earning extra cash is not impossible with a print-on-demand drop-shipping business. Plus, it’s 100% remote.

Print-on-demand drop-shipping business models help you sell your own clothing line without holding inventory or purchasing expensive equipment. You can make money without clocking into a typical part-time job while creating your own online business.

The best part? It’s paid exposure for new and emerging artists. You’ll earn recognition and profit simultaneously!

What you’ll need to get started:

  • At least one design to customize a clothing line
  • A small investment to set up your store (typically around CAD$35/monthly)
  • Time and commitment to promote your business

Another bonus? You’ll gain real world experience for marketing and promoting your artwork and earning income.

Once you’ve set up your online store and designed your custom clothing line, you can begin promoting your products on social media and interact with your customers to create a loyal customer base.

If you want to learn how print-on-demand drop-shipping businesses work or have any questions, send us an email or DM us Instagram. Your vision is our mission.

Categories
Business Tips

Use print-on-demand to expand your side hustle

Looking to explore other revenue streams to make your side hustle more profitable? Print-on-demand is one the best ways (and it’s super low risk) to elevate your side hustle and increase passive income.

Let’s break down the benefits of print-on-demand for people with side hustles.

Quick & simple set-up

Print-on-demand businesses are easy to set up. Check out this blog to read the 5 easy steps to create a print-on-demand business.

Low risk

With print-on-demand, you can set up an online store with a low investment, making it low risk.

Traditional businesses require a large upfront investment which makes starting a typical business high risk. Your upfront investments include e-commerce platform costs (usually between CAD$20-30 per month) and product sample costs (Slaite sample products are as low as CAD$12.55).

If you’re outsourcing your designs, that can also add to your investment but compared to traditional business investments, your upfront investment is thousands of dollars less.

And, with a free to use service (ahem, Slaite), no minimum orders, no inventory costs and no warehousing fees, you save even more money than a typical retail business.

Full creative control

With print-on-demand, you can design your custom products with your own creative artwork.

Hot tip: A print-on-demand drop-shipping business varies from a typical drop-shipping business because with print-on-demand, you have much more control over your product customization. With drop-shipping alone, you are usually limited by the products already available by the supplier.

Quality printing

Print-on-demand providers are typically experts in custom printing (Slaite has over 20 years experience) and can replicate your beautiful designs into a final product.

Not only are we experts but our technology helps save you money. Using Direct to Film printing decoration keeps costs down when compared to screen printing decoration.

Sustainability

If being eco-conscious is something that’s important to you, print-on-demand drop-shipping will certainly align with your goals. Instead of ordering bulk inventory that may never be used, print-on-demand produces orders on-demand so there are no wasted textiles.

Room to grow

With print-on-demand drop-shipping, you can scale way up because you rely on outsourcing production and shipping to experts and their equipment.

Typical businesses have to be careful about growing too fast and not be able to keep up with demand. With a print-on-demand side hustle, you are less restricted to exponentially grow your business.

24/7 sales

If you’re hosting your store on an e-commerce platform like Shopify, your store is basically open 24 hours a day, 7 days a week. Orders can be placed and processed immediately.

Shopify even has automated emails that are sent on your behalf during each phase of the customer’s journey. So all you have to do is create your store and the rest is virtually on autopilot.

Have more questions about print-on-demand or drop-shipping? Drop us a message by sending an email or DM us on Instagram. We’re always available to help.

Categories
Business Tips

How to build a brand for your print-on-demand business in 6 simple steps

If you’re starting your online custom clothing business with print-on-demand and drop-shipping but need help with creating your brand, we’ve got you.

Bringing your creative passions to life can be easy (with Slaite print-on-demand) but building a complete brand identity can be a daunting task. If you’re new to the business world, you may have aversions to branding and appearing corporate – we get it.

But, branding is an effective tool to indirectly communicate with your target audience and improve your non-verbal relationship with potential customers simply through visual appearance and digital presence.

Online businesses require a proper branding playbook because without a physical storefront to meet and greet your client base, your digital presence represents your entire business.

But don’t let this discourage you: having an online presence means you can reach more people at any time! Another plus to having an online brand: e-commerce grew exponentially in 2020 and it’s projected to continue to grow in 2021.

We scoured marketing and branding guides to simplify the process for creating a brand into 6 simple steps. Let’s break down what elements you need to create a brand and how to carry out each task. If you want to read more, we’ve included several resources at the end of this article.

Do your homework

Researching your target audience as well as your direct and indirect competitors will provide insights into the market (example: custom apparel with artistic designs). These insights will help you understand who your customers are and what will set your company apart from the competition.

Research is the most time-consuming component of building your brand, but the findings are priceless. You can use free tools to research including Google, social media platforms, competitor websites and industry forums or subreddits.

Define your company’s values

After researching externally and understanding the market, turn inwards to identify what core values and principles will define your company. Your values and principles help guide your mission statement. With this framework in place, all future brand communications can build out of this foundation. If you need help, or want an extremely thorough brand strategy guide, check out this article from Column Five Media with free templates.

Choose your personality

A consistent brand personality throughout your website, email and social media communications will improve your audience’s ability to accurately define your brand without being explicitly told the personality traits.  Try answering the below questions to begin curating your brand personality:

  • What makes your company unique?
  • What are some personality traits you want consumers to think of when they encounter your brand?
  • What separates your brand from the competition?
  • What unique solution do you provide to your target audience?
  • What words would you use to describe your brand?

Let’s get visual

With your newfound understanding of the marketplace and your defined brand values, mission and personality, you can start to develop your visual branding elements. These elements include your color palette, fonts, logo and any graphics that will accompany your branded messages.

Need help with your visuals? This Shopify blog includes a color psychology infographic and a resource to help you select your fonts.

Put it into practice

With your established brand personality and visual elements, you can begin implementing your brand elements across your website, social media channels and customer communications.

Evolve with time

As your brand matures and grows, it’s important to keep an eye on how your brand is performing in the market, with your customers and in relation to your competitors. While a complete re-branding is typically not necessary, refreshing or modifying minor elements in your brand identity will help keep your brand relevant and will continue to enforce strong branding across all communication efforts.

Extracurricular Learning

Here are some helpful links if you want more in-depth reading to help establish your brand.

How to Start Your Own Brand From Scratch in 7 Steps

7 Principles To Building A Strong Brand

The Basics of Branding

How to Develop a Unique (& Memorable) Brand Identity in 2020

How to build a brand in 5 days: Tips from a designer (Infographic Included!)

How to Build a Memorable Brand in 6 Steps

How to Create a Powerful Brand Identity (A Step-by-Step Guide)

How to Build a Personal Brand that Stands Out (Without Selling Out)

How to Build Your Own Personal Brand

How to Build a Brand from Scratch: Your Complete Guide

Categories
Design Tips Slaite Library

Design your print-on-demand apparel in 4 easy steps

You’re beginning your online custom apparel business journey and need help designing? We’ve got you.

Step 1: Sign up with Slaite

The first step is to create an account with the Slaite app, your print-on-demand drop-shipping provider, to begin your design journey. It’s free and easy to use.

Step 2: Browse our catalogue

Next, you’ll want to review the product offerings available on the Slaite catalogue.

We offer tank tops, t-shirts, long sleeve tees, sweatshirts, hoodies, zip up sweaters, jackets, hats and masks. We’re always looking to bring on new products offerings for you to design.

Once you’ve decided what products you want to offer on your online store, you can begin designing them in the Slaite design studio.

Step 3: Check your artwork quality

To print or embroider a design, you’ll want to ensure your file meets the correct criteria. Our FAQ is full of information about design specs and we’ve linked to the appropriate answer below.

You’ll want to ensure the design and the garment are not the same, or too similar, in color. For example, printing an all-black logo on a black or dark grey shirt may not result in a striking design. If you have an all-black logo, we recommend printing it on a lighter color garment. Alternatively, you can change the logo or design to a lighter color to print on a dark garment.

Step 4: Design your product

Creating with Slaite is easy. You bring your vision to the garment and it is our mission to fulfill and deliver with quality and speed.

If you’re new to designing garments, we’ve provided some helpful tips and quick videos covering the tips. Good luck!

Helpful hacks:

More of a visual learner? We cover the helpful hacks in this video. Check it out!

  • In the Slaite Design Studio, you’ll notice a box with a green dotted outline. These guidelines show where you can place your design. If you place your design outside the green dotted line, it will not be printed or embroidered.
  • Stretching your design in the studio will lower your dpi and ultimately lower your printing quality. If you want to make your logo or design larger, we suggest increasing the size in your editing software to accommodate the larger size you want.
  • If your design is poor in quality or at-risk for not being printed because it is outside the green dotted guide, our helpful alerts will notify you and you can adjust the design location or resolution.
  • The rulers at the top and bottom of the window provide an estimate for the size of your design.
  • You can create your own design in the studio by adding your own text and shapes or altering your image.
  • Cloning your logo or design can create a unique pattern or collage. You can reorganize the objects and truly customize the design on the garment.
  • The Slaite design studio lets you customize what tools and guides you use during garment design.
Categories
Design Tips

Top 5 fashion trends of 2021 for your print-on-demand business

We show you how to leverage the most popular 2021 fashion trends in your custom apparel designs.

If you’re looking to spruce up your custom apparel gear with the most popular fashion trends for 2021 but need inspiration, look no further. We’ve got you.

We researched and compiled the top 2021 fashion trends in the article below. We share ideas on how you can use these trends in your custom collections or even designs in the coming months.

Loungewear

The proof: Let’s begin with the obvious. Loungewear popularity exploded last spring and there is no sign of slowing this trend.

How to: Add your creative design to any of our cozy sweaters to become your customers’ staple loungewear piece. Our top pick is the Independent Midweight Full Zip Hooded Sweatshirt. The best news? You can print or embroider this garment, giving you complete creative freedom.

Masks

The proof: Another obvious choice. In a TrendHunter report sharing the top 100 trends for 2021, we noticed over 20% of trends were related to masks. Not only is mask popularity and demand increasing but matching mask sets ranked #30 of the 100 trends. Black masks were deemed one of the most popular accessories – and we’ve got a black mask waiting for your creative design!

How to: Consider adding your creative design to both a black t-shirt and black mask as a bundled set in your online store. Our top picks are the Reusable Organic Cotton Mask and the Bella Canvas Greenwich Unisex Tee.

Logomania

The proof: Logos were declining in popularity in 2020 but according to Vogue France, designers have brought logos back through collages, neon effects or patchwork logos for streetwear.

How to: This is your opportunity to leverage logo popularity and design crave-able products for your customers! Use your logo in various designs, such as a neon effect applied to your existing logo, to give your traditional logo an updated or exclusive feel.

Color

The proof: Pantone announced its annual color of the Year as a sunshine yellow and a cool grey. The sunshine yellow, Illuminating 13-0647, and the cool grey, Ultimate Gray 17-5104, are meant to signify sunshine peaking through the clouds. Sorbet pastel tones and earth tones are also seen throughout Spring/Summer fashion shows suggesting a move away from harsh, bold or neon colors.

How to: If your brand makes new designs consistently, consider adding in the Pantone Color of the Year, sorbet pastels or earth tones into your new designs. Alternatively, you can place your designs on garments available in pastel colors or earth tones. Our top picks include Independent Women’s Lightweight Hooded Sweatshirt, Independent Midweight Hooded Sweatshirt, Alstyle Ultimate T-Shirt, Next Level Ladies CVC Crew Tee and the Yupoong Classic Dad Cap.

Baseball Caps

The proof: Baseball caps were featured in Summer 2021 collections and notable celebrities have been seen sporting this accessory.

How to: Play ball and put your logo on the Yupoong Classic Dad Cap to bring your brand into this trend.

If you have any other design questions, feel free to send us an email or DM us on Instagram.

Categories
Business Tips

5 Steps to Setting Business Goals in the New Year

Goal Setting: The Key to Success in 2021

Establishing business goals is an essential component to growing your success. Although the year 2020 threw a serious curve-ball into most businesses’ goals, creating an actionable plan for your business is one of the best investments to grow your creative business – no matter where you start.  

Plus, with a print-on-demand drop-shipping model, your business is on the right path!

The print-on-demand and drop-shipping industry has made waves for a few years and continued industry growth is expected for 2021. The new year is the ideal time to take your creative business to the next level and begin working towards your business goals.

Need help getting started? We’ve got you. Here is a five-step plan to help you become a goal setting pro. Check it out below!

Step #1: Determine Your Future

Begin thinking about your business aspirations. This helps you create a vision for your business and helps you during goal planning. Your business vision should be one sentence in length and should express the overarching business goal. The purpose of this step is to build a business benchmark to develop holistic plans and goals based on your vision.

When developing your business vision and planning for the future, try to avoid planning for the short-term only. You can think one year, five years, or even ten years into the future!

Pro Tip: Ask yourself questions during this process to help you figure out what you want to accomplish. Start by asking yourself: where is my business currently and where do I want to take it? What are my current priorities and what will my priorities be once I begin working towards my vision? By thinking about the changes your business will go through during growth periods, you can begin to imagine goals at each checkpoint.

Step #2: Write it Down

Writing your goals down engages you with your ideas in a physical realm (a piece of paper or your computer screen) and reinforces the importance of your aspirations in your brain. Research shows that writing down important information, such as goals or plans, helps you not only remember important events or details, but it helps your mind become more efficient and focused.

Whether you choose traditional pen and paper or a digital planning tool, documenting your goals contributes to a 1.4 times higher success rate.  

Step #3: Create an Actionable Roadmap

You’ve established your business vision and you’ve begun writing your goals, plans, and business ideas down. The next step includes defining a tactical roadmap to reach your business vision. Your roadmap should include sub-goals to level up to your overarching business goal to achieve your vision. Defining each sub-goal will help break out each step to reach your goal. Make these goals specific, timely, attainable, measurable and relevant to your vision.

For example, here’s what a simple goals roadmap could look like:

  1. Q1: Reach $1000 sales and grow newsletter subscribers by 5%
  2. Q2: Reach $5000 sales and grow newsletter subscribers by 10%
  3. Q3: Reach $20,000 sales and grow newsletter subscribers by 15%
  4. Q4: Reach $100,000 sales and grow newsletter subscribers by 20%

Step #4: Commit & Hold Yourself Accountable

Check in with the progress of your goals – whether that’s daily, weekly, or monthly is entirely up to you. Choose what works best for your business to track your success at pivotal business moments. Observe any obstacles or opportunities, whether internal or external, that may impact your business goals. If you identify any obstacles or opportunities, write them down ahead of time to avoid guesswork when you’re measuring success. This is always a great time to give yourself the boost you need to get motivated and keep working towards your creative goals!

Step #5: Measuring your success

Measuring business goals varies between each business and each initiative. Your sales report will differ from your social campaign measurement or your advertising report. Reporting on your progress helps illuminate effective business initiatives (or ineffective) and allows you to adapt your plans to reach your goals.

Extra step: Celebrate!

Finally, enjoying your goal milestones and achievements. You’ve invested time and energy into your print-on-demand business. You deserve to celebrate your accomplishments.

If you have more questions about print-on-demand, drop-shipping or Slaite, check out our other blogs and FAQ section or send us a message. We are always ready to help Creators realize their creative vision.

Categories
Business Tips

How to Start a Low Investment Side Hustle

If having limited financial resources is preventing you from starting your side hustle, you need to read this article. You can begin your online business today with a small investment and from the comfort of your own home.

How? Print-on-demand and drop-shipping!

We’ve talked about print-on-demand and drop-shipping in previous blogs so check those out if you haven’t already.

Today, we’re sharing free or cost-efficient tools to minimize the cost of running a print-on-demand drop-shipping business without sacrificing the features you want. Let’s get into it!

Select a free print-on-demand drop-shipping supplier

If you’re familiar with Slaite (and if not, welcome!), you’ll already know it is FREE to use. Designing a custom collection is simple with print-on-demand.

All you do is sign up, add your creative designs to any of our products, set your product names, descriptions and margins and finally publish to your online store. We take care of product sourcing, production and shipping directly to your customers.

Design and sample your custom products at a low cost

If you’ve got your own designs or can easily make them, you’ve won half the battle.

Slaite is free to use and the only additional cost is buying samples (which we encourage because it’s always good practice to see before you sell). Sample costs are as low as CAD$12.65 and you can also use your samples for photography (another money saving tip!).

If you’re looking to outsource your designs, it can get a bit pricier for upfront costs. However, there are online resources where you can hire a freelance designer to meet your design needs at your budget. If you need design help, check out these popular freelance sites:

Sign up with an e-commerce website

You’re ready to start your online business. Right on! Using an e-commerce platform and paying for a monthly subscription is likely the most investment you’ll pay for a print-on-demand drop-shipping business in the beginning.

Shopify offers free trials so you can start setting up your online store while paying absolutely nothing.

Monthly subscriptions start at USD$29 and plans increase based on additional features. We recommend starting with this plan and scaling up as your business grows.

And, with Shopify, you can build your business website and sell your products using customizable (and free!) templates.

Download free or inexpensive Shopify apps

Shopify has over 4,000 apps in the app store. Some are free and some require payment, but we’ve found some of the best free or cost-efficient apps for online businesses to elevate the side hustle.

You don’t need to download all these apps but choose the ones best suited for your business.

  • Shopify Email: Email marketing is an efficient way to build loyal customers, but email service providers can be expensive, time-consuming, and confusing. Shopify Email has a free plan you can begin using today. Click here for a helpful tutorial on how to use this service.
  • Plug in SEO: If you’re not an SEO expert, it can be challenging to get your store on search engine pages with relevant search terms. The app is easy to use and takes you through the process step-by-step, plus it has a free plan available.
  • Product Reviews: Testimonials provide new customers valuable information when shopping for a product. Product Reviews is a free app to help gather customer testimonials, increase sales through peer credibility and improve your SEO results.
  • Replay Live Session Recordings: This free tool shows you live recorded sessions of how your customers interact with your store. If something is working (or isn’t), Replay will show you these immensely valuable insights so you can evaluate and repair your site or promotional efforts. Best of all – it’s totally free for up to 5,000 sessions per month which is great for new businesses!
  • Friendly Accessibility Tools: Your customers are unique and have unique needs. This app helps you improve the accessibility of your site to ensure anyone can come to your site and find what they’re looking for. Best of all? It’s free!
  • Change Commerce: If you’re interested in bringing social causes and donations into your online business model, Change Commerce supports over 1.5 million non-profits. The first twenty donations are free. Afterwards, a 0.5% transaction fee on orders with donations.

Upgrade your imagery

Photo-shoots, video production and video editing along with social media graphics can become pricey and time-consuming. Adding these free tools to your arsenal will cut the cost and time for creating your branded imagery.

  • Another free Shopify app: Promo.com. Engaging video content elevates your online business. This app takes imagery from your website and products to make a promotional video for your storefront – simple and free!
  • Need help with creating social posts? Canva is an amazing tool where you can create and edit social posts! Of course, there is a paid version with more features, but the free subscription is still a great option while you’re starting out!
  • Want to elevate your product shots but don’t have the time or money for a photo-shoot? PlaceIt allows you to place your artwork onto a mock-up of various items, including shirts, sweaters, hats and masks. There are several free templates for you to choose from and you can download these images for your social channels, website or emails.

If you have any side hustling hacks we didn’t cover, get in touch and send us a DM on Instagram.

Categories
Slaite Library

Advanced Embroidery Design

Everything you need to know about embroidery designs

If you’ve read our Slaite blog post outlining the six best tips for custom embroidery but you still have questions or want to know more about design best practices.

We’ve got more advanced embroidery design tips. Keep reading!

Your Design

Before uploading your artwork, consider whether your design is optimized for this decoration type.

Clean lines and simple shapes are critical for embroidery. In our previous blog post, we discussed styles to avoid, the color blending limitations, location consideration, the best material to embroider and hat designs.

In this article, we share visuals to show best practices for embroidery design with detailed explanations. Each logo in this article does not follow embroidery design best practices. We’ll tell you why and how to avoid.

Tulip Logo

Original Digital Image of Logo*

Digitized Logo for Embroidery*

What’s wrong?: Too many fine lines and details in this design.

What will happen?: Thread has a physical weight. This makes it difficult to re-create delicate designs, particularly for small areas. During digitization, the lines and details would likely be simplified or removed. This results in a discrepancy between the digital display logo and the rendered design.

Fun fact: in this digitized example, the fine lines are created using a run stitch. This type of stitch is created when a needle is passed in and out of the fabric in regular intervals. If this design were applied to a small location (for example, a hat), then the fine lines and details would be simplified further to ensure there is enough physical space for the thread. Consider the real-world dimensions of your artwork by reviewing the design guide box dimensions in the Slaite design studio and comparing your artwork within the design box. We show you how to do this within the Slaite design studio in the video below!

How to fix?: Simplify fine details to make the logo crisp with clean lines and consider removing the text for smaller design locations. Alternatively, you can use Direct to Film (DTF) printing to achieve photorealism.

Lion Logo

Original Digital Image of Logo*

Digitized Logo for Embroidery*

What’s wrong?: Too many fine lines, details, outlines and small text.

What will happen?: Like the Tulip Logo, the lines and details would be simplified or removed during digitization. If this logo were applied to a small design area (for example, the side of a hat), the small text and fine lines above the text would need to be removed.

Fun fact: in the digitized image, the “Lion Logo” text is created using a column stitch. A column stitch is created by using a zigzag stitching method and creates a column or cylindrical element. If this design was placed on a small location, the stitch type may be changed to run stitch and may compromise the design. Larger design areas can accommodate more legible text whereas it’s challenging to include text in smaller design areas.

How to fix?: Simplify the fine lines and details to make the logo crisp and remove the small text if designing a smaller location.

Logo Life

Original Digital Image of Logo*

Digitized Logo for Embroidery*

What’s wrong?: Shadows and color gradients are not recommended for embroidery design.

What will happen?: DTF printing can beautifully execute shadows and gradients because the technology uses high-resolution to replicate the digital image experience. However, in embroidery, the physical dimension of thread does not allow a smooth transition between the dark and light colors. In the Logo Life artwork, the shadow opacity is less than the “Logo Life” text. Since thread opacity is consistent throughout all colors, the shadow would make the artwork appear busy or potentially illegible.

How to fix?: Remove the shadows or color gradients from your design for embroidered products and use a logo with crisp, clean lines.

What about design size?

In the above examples, we’ve mentioned small design locations. What does that mean for your design?

Each product’s design location (the green dotted box) shows what area is eligible for decoration. If you have an intricate logo and there is not enough space to accurately replicate the design, your artwork will be compromised. But, if your design is simple then you could make it as small as 1 inch.

Rule of thumb: the larger the design, the more details can be accommodated but the smaller the design, the less details can be accommodated.

How to use the Slaite design studio

In the Slaite design studio, you’ll see the guide box (green dotted line) for embroidery areas. This green box represents the real-life dimensions of the embroidery placement guides our machines use to plot your design pattern. At the top and left of the design studio, you’ll see rulers in inches to help determine the size of your rendered artwork.

In this video example, we show you the guide box demonstrates the design location for the Yupoong Flat Bill Snapback hat is approximately 4.5” W x 2” H. When the Slaite logo is added, the logo appears to be 1.5” W x 0.5” H. This guide is a good indication of the size and location of your design but we always recommend ordering a sample to visualize exactly how your product will look.

The journey from digital mock-up to embroidered design

You create a collection with your logo embroidered on a garment. You’ve seen the digital mock-up of your design in the Slaite design studio but what happens behind the scenes between digital mock-up to physical product? Here are the steps:

  1. Product is designed in a collection.
  2. A sample order (or customer order if the product is published in Shopify) is placed.
  3. The artwork is converted into a digitized image file and a barcode is assigned to the file. This barcode includes all design information including the size and colors of the design as plottable data. This data is read as a pattern by our embroidery machines to customize your products.
  4. Our operations team carefully prepares the garment for the embroidery process. A team member selects the appropriate embroidery placement guide before bringing the readied garment to the embroidery machine for decoration.
  5. When the product is ready for decoration, the barcode is scanned by our embroidery machines to begin a fully automated sewing process and applies the design to the garment. Your product is fulfilled and ready to be shipped to your customers!
  6. The digitized design is saved in the Slaite database for all future orders.

If you have any other embroidery design questions, please reach out to help@slaitepod.com. We’re listening!

*Disclaimer: all logos used in this article were created by Slaite for educational purposes only.